
There is a widespread belief that drying basil at home is difficult or requires special equipment, but that is not true. Learning how to make dried basil is simple when you choose the right method and handle the leaves carefully.
You can preserve fresh basil using air drying, an oven, a microwave, or a food dehydrator, depending on the time and equipment you have available.

Homemade dried basil is a practical way to enjoy your favorite herb even when fresh leaves are unavailable. With a few simple steps, you can prepare basil for pasta sauces, soups, pizza, and other everyday recipes. The key is to dry the leaves properly, protect their natural aroma, and store them in an airtight container to help maintain their flavor.
Why Should You Make Homemade Dried Basil?
Many people believe that store-bought dried basil is always the best choice, but making your own at home has several benefits. Homemade dried basil helps you preserve fresh leaves, reduce food waste, and enjoy flavorful herbs whenever you need them.
It also gives you more control over the quality, freshness, and storage of your herbs. Let’s explore why making dried basil at home is a smart and simple choice for your kitchen.
Enjoy Fresh Basil Flavor All Year
Fresh basil is delicious, but it does not stay fresh for very long. Drying extra leaves gives you a convenient supply to use throughout the year, even when your garden is no longer producing new growth.
Although dried basil has a slightly different flavor from fresh basil, it still adds a pleasant herbal taste to many cooked dishes.
Save Money With Home-Dried Herbs
If you grow basil at home or buy it in large bunches, drying the extra leaves can help reduce food waste. Instead of throwing away basil you cannot use before it wilts, you can turn it into a useful kitchen ingredient.
Homemade dried basil also saves you from buying small jars of dried herbs as often, making it a budget-friendly option for everyday cooking.
Control the Quality of Your Dried Basil
Making dried basil at home lets you choose which leaves to keep and how to prepare them. You can select healthy leaves, remove damaged ones, and use a drying method that suits your needs.
You also control how you store the finished herb, helping protect it from moisture, excessive heat, and direct sunlight. These small steps can make a difference in the quality of your homemade dried herbs.
Use Dried Basil in Everyday Recipes
Dried basil is a versatile ingredient that works well in many recipes. Add it to tomato pasta sauce, sprinkle it over pizza, or mix it into soups, stews, marinades, and salad dressings. You can also combine it with oregano, thyme, and other herbs to make homemade Italian seasoning.
Because dried basil has a more concentrated flavor than fresh basil by volume, start with a small amount and adjust it to suit your taste.
When and How to Harvest Basil for Drying
Many people think you can harvest basil leaves at any time and get the same results when drying them, but timing matters. If you want to learn how to make dried basil with a rich aroma and good flavor, start by choosing healthy leaves and harvesting them at the right time. Proper harvesting helps you get better-quality dried herbs and makes the drying process easier.
When to Harvest Basil Leaves
The best time to harvest basil for drying is usually in the morning, after the dew has evaporated but before the day becomes too hot. At this time, the leaves are often fresh and full of aroma. Avoid picking wet basil because extra moisture can make drying take longer.
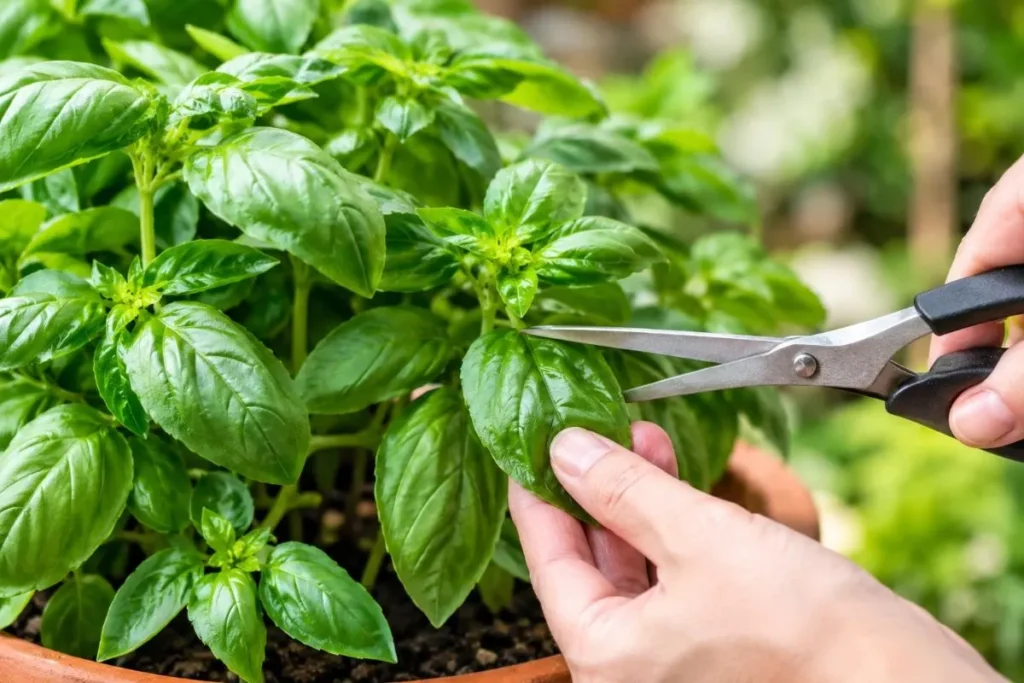
Choose a dry day whenever possible. If your basil plant has plenty of healthy growth, you can harvest mature leaves or trim small sections of the stems. Try to harvest before the plant produces many flowers, as this can help maintain good leaf quality. However, flowering basil can still be harvested and dried if the leaves look healthy.
How to Choose the Best Basil Leaves
Healthy leaves are the best starting point for homemade dried basil. Look for leaves that have a strong, fresh basil smell and a natural green color. Choose leaves that are firm and free from obvious damage.
Avoid leaves that are yellow, slimy, badly bruised, or covered in spots that may indicate disease. Remove any leaves with visible mold or signs of pest damage. Starting with clean, healthy basil helps you produce dried leaves that look and smell better.
If you grow sweet basil in your garden, you can use it for drying just as you would other culinary basil varieties. Select leaves of a similar size when possible, as this can help them dry more evenly later.
How to Harvest Basil From Your Garden
Harvesting basil is easy, and you do not need special gardening tools. Use clean scissors or garden snips to cut healthy stems, or gently pick individual leaves when you only need a small amount.
If you want your basil plant to keep growing, avoid removing all its leaves at once. Cut stems just above a pair of healthy leaves or leaf nodes, where new branches can develop. Leave enough foliage on the plant so it can continue growing.
Once you have collected enough basil, place the leaves in a clean basket or container. Avoid squeezing them into a tight pile because bruised leaves may darken more quickly. Bring your harvest indoors soon after picking it, especially on warm days, to protect its freshness.
Whether you grow basil in a garden bed, a raised planter, or a pot on your windowsill, these simple harvesting steps will help prepare your leaves for drying.
Can You Dry Basil Stems?
Yes, you can dry basil stems, but it is best to choose them carefully. Thin, tender stems may dry along with the leaves and can be used in some seasoning blends. However, thicker stems contain more moisture and may take longer to dry than the leaves.
For the best results, remove thick or woody stems before drying basil. Keep the healthy leaves and any tender stems you want to use, and separate them if their thickness differs significantly. This helps prevent the leaves from becoming brittle while thicker parts remain damp.
If you plan to crumble your dried basil into flakes, removing most of the stems will also give you a finer, more pleasant texture. Once harvested and sorted, your basil will be ready for the next step: preparing the leaves for drying.
How to Prepare Fresh Basil Before Drying
Many people believe that fresh basil can go straight from the garden into the drying process, but a little preparation makes a big difference. Before learning how to make dried basil, take time to sort the leaves, remove dirt, and get rid of excess moisture. These simple steps help the basil dry more evenly and reduce the risk of mold or spoiled leaves.
Remove Dirt and Damaged Leaves
Start by spreading your harvested basil on a clean kitchen towel or tray. Look through the leaves and remove any yellow, bruised, torn, or diseased ones. Also, check for small insects, bits of soil, and other debris that may have collected on the plant.
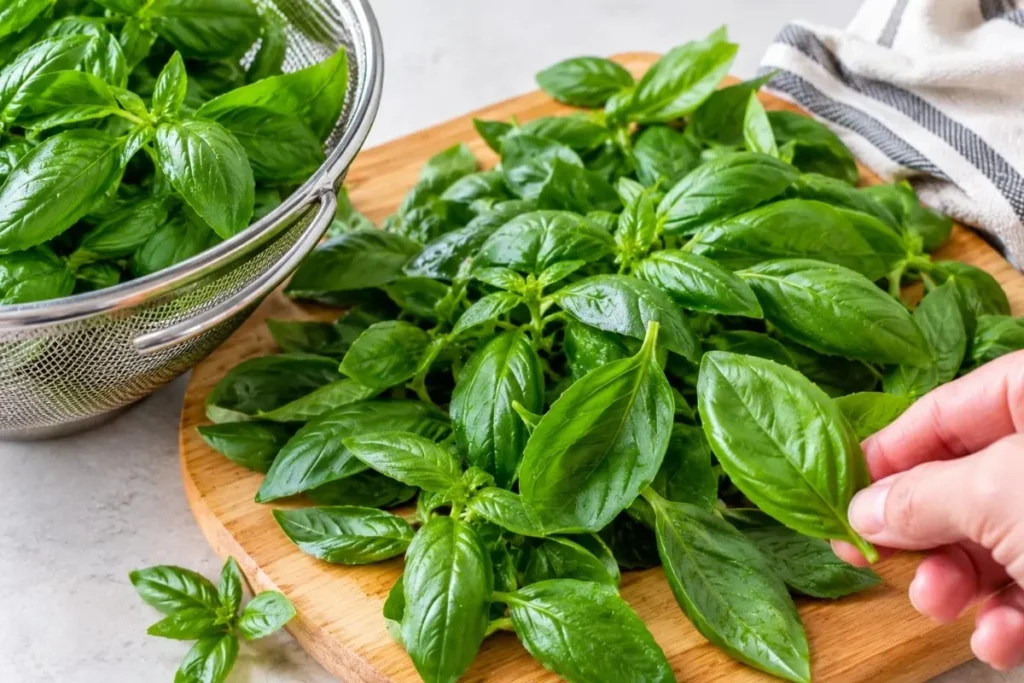
Keep the healthy green leaves for drying. If some leaves have minor physical damage but are otherwise clean and healthy, you can still use them. However, discard leaves with visible mold, slimy patches, or signs of serious disease. Sorting your basil first helps you prepare better-quality homemade dried herbs without wasting good leaves.
Washing Basil Before Drying
Should you wash basil before drying it? If the leaves have dirt, dust, or insects on them, gently rinse them under cool, clean running water. Handle them carefully because basil leaves can bruise easily when rubbed or squeezed.
After washing, remove as much surface water as possible. You can use a salad spinner on a gentle setting or lay the leaves in a single layer between clean kitchen towels. Pat them lightly instead of pressing hard, which may damage the delicate leaves.
If your basil is already clean, you may not need to wash it. The important thing is to make sure the leaves are free from dirt and excess surface moisture before drying.
This preparation is especially useful when you plan to air dry basil leaves, as wet leaves take longer to dry and may develop mold in humid conditions.
Let the Leaves Dry Before Applying Heat
Even when you plan to use an oven, microwave, or food dehydrator, removing surface moisture is an important step. Water left on freshly washed leaves can slow the drying process and make the results less consistent.
Spread the basil leaves on a clean towel and allow them to air-dry until they no longer feel wet. Avoid leaving them in a thick pile, as trapped moisture can collect between the leaves.
You do not need to leave them out for hours just to remove surface water; simply make sure they are not visibly wet before proceeding.
Remember that surface drying is not the same as fully drying the basil. The leaves will still contain natural moisture, which your chosen drying method needs to remove. Preparing them properly helps you get more consistent results when making dried basil at home.
Prepare Basil Leaves for Different Drying Methods
The best way to prepare basil depends partly on how you plan to dry it. For air drying, keep the leaves whole whenever possible. Whole leaves are easier to handle and can help preserve their aroma until you are ready to use them.
For oven drying or dehydrating basil leaves, arrange them in a single layer so air or heat can reach each leaf. Avoid stacking or overcrowding them because some leaves may dry faster than others. If you are using a microwave, prepare small batches that fit comfortably between clean paper towels without tightly packing the leaves.
You may be tempted to chop the basil before drying, but this is usually unnecessary. Cutting the leaves exposes more of their surface to air and can cause their aroma to fade more quickly. It is generally better to dry the leaves whole and crumble them afterward when making basil flakes or seasoning.
Once your basil is clean, sorted, and free from excess surface water, it is ready for the drying method you choose. Proper preparation makes the next step easier and helps you produce dried basil with better color, texture, and flavor.
Frequently Asked Questions About How to Make Dried Basil
Many people think making dried basil at home requires special equipment or complicated steps, but you can prepare it with basic kitchen tools. The best method depends on how much time you have, the equipment available, and how you want to use the finished herb. Here are answers to common questions about drying, storing, and using homemade dried basil.
Can You Dry Fresh Basil at Home?
Yes, you can easily dry fresh basil at home. You can use several methods, including air drying, oven drying, microwave drying, and a food dehydrator. Each method removes moisture from the leaves, allowing you to keep them for later use.
Choose healthy basil leaves and remove excess surface water before drying. Once the leaves become completely dry and brittle, let them cool and store them in an airtight container. This is a simple way to preserve basil from your garden and keep a useful supply of dried herbs in your kitchen.
What Is the Easiest Way to Dry Basil?
Air drying is one of the easiest methods because it requires very little equipment. You can spread the leaves on a clean drying screen or hang small bunches in a dry, well-ventilated area away from direct sunlight.
However, air drying takes longer and may not work well in humid conditions. If you want faster results, an oven or food dehydrator may be more practical. Choose the method that suits your kitchen and check the leaves regularly to make sure they dry evenly without scorching.
Can You Dry Basil Without a Dehydrator?
Yes, you do not need a dehydrator to make homemade dried basil. Air drying and oven drying are two useful alternatives.
For air drying, spread the leaves in a single layer with enough space for air to circulate. Keep them in a dry location and check them regularly for signs of moisture or mold.
For oven drying, arrange the leaves on a baking sheet and use the lowest suitable temperature. Check them frequently because basil leaves are delicate and can burn quickly. Both methods can produce dried basil when you control moisture and avoid excessive heat.
Can You Dry Basil in the Microwave?
Yes, you can dry basil in the microwave, which is useful when you only have a small quantity of leaves. Place the clean, surface-dry leaves between paper towels and heat them in short intervals.
Check the leaves after each interval and allow them to cool briefly before testing their texture. Continue carefully until they become dry and brittle. Avoid using one long heating cycle because the leaves can scorch, darken, or lose their aroma quickly.
Microwave drying is convenient, but it requires close attention. If you want to dry a large harvest, an oven or dehydrator may be easier to manage.
How Do You Know When Basil Is Dry Enough?
Basil is ready when the leaves feel crisp and crumble easily between your fingers. They should not feel soft, leathery, or damp in the center.
Let the leaves cool before checking them because warm leaves can feel different from completely cooled leaves. If they bend instead of crumbling, they may need more drying time.
Make sure the leaves are fully dry before storing them. Any remaining moisture can encourage mold inside a sealed container. If you notice condensation after storage, or the basil develops visible mold or a musty smell, discard it rather than trying to salvage it.
How Long Does Homemade Dried Basil Last?
Properly dried basil can retain good flavor for several months, although its aroma gradually fades over time. The exact shelf life depends on how thoroughly you dry the leaves and how you store them.
Keep dried basil in a clean, airtight container in a cool, dark place. Protect it from moisture, direct sunlight, heat, and steam from cooking. Whole leaves generally retain their aroma better than leaves crushed into small flakes because less of their surface is exposed to air.
Before using older dried basil, check its smell and appearance. If it has lost most of its aroma, it may contribute little flavor to your recipes.
Should You Wash Basil Before Drying It?
Wash basil if the leaves have visible dirt, dust, or insects. Rinse them gently under cool, clean running water, then remove excess moisture with a clean towel or salad spinner.
If the leaves are already clean, washing may not be necessary. The main goal is to prepare clean leaves without adding unnecessary moisture to the drying process.
This step is especially important when air drying basil because damp leaves can take longer to dry in a humid room. Always check the leaves before storing them to make sure they are completely dry.
Can You Dry Basil Stems Along With the Leaves?
Yes, you can dry tender basil stems along with the leaves, but thicker stems may take longer to dry. If you dry stems and leaves together, the leaves might become brittle before the stems are fully dry.
For a finer seasoning, remove most of the stems and keep the leaves. If you want to use tender stems, separate them from thicker pieces and check that every part is completely dry before storage.
You can crumble the dried leaves by hand or grind them into smaller flakes when preparing seasoning. Keeping the leaves separate from thick stems usually makes the finished product easier to use in cooking.
Is Homemade Dried Basil Better Than Store-Bought Basil?
Homemade dried basil can be a great choice if you have fresh basil available and want more control over its quality. You can choose healthy leaves, select your preferred drying method, and store the finished herb in small batches.
It may also help reduce waste if your garden produces more basil than you can use fresh. However, store-bought dried basil is convenient and saves preparation time. Its quality can vary depending on freshness, processing, and storage.
The best option depends on your needs. If you enjoy gardening or regularly buy fresh basil, drying it at home is worth trying.
Can You Use Dried Basil Instead of Fresh Basil in Any Recipe?
You can substitute dried basil for fresh basil in many recipes, but it does not work equally well in every dish. Dried basil is particularly useful in pasta sauces, soups, stews, and other cooked meals where its flavor has time to blend with the ingredients.
A common starting point is to use about one-third as much dried basil as fresh basil, then adjust the amount to taste. For example, if a recipe calls for one tablespoon of fresh basil, start with about one teaspoon of dried basil.
Conclusion:
Many people believe that making dried basil at home is difficult or requires special equipment, but that is not the case. Learning how to make dried basil is a simple way to preserve fresh herbs and enjoy their flavor long after the growing season ends.
Whether you grow basil in your garden or buy fresh leaves from the store, drying is a practical way to use up extra herbs instead of letting them wilt in the refrigerator. With a little preparation and the right drying method, you can make your own homemade dried basil using tools you may already have in your kitchen.
You can choose from several methods, including air drying, oven drying, microwave drying, and using a food dehydrator. Air drying is a good option if you have enough time and live in a dry environment, while oven drying can be helpful when you want results sooner.
A dehydrator provides consistent heat, and the microwave can dry small batches quickly when used carefully. No matter which method you choose, remember that basil leaves are delicate and can lose their aroma if exposed to too much heat. Check the leaves regularly and remove them once they become dry and crumbly.
Proper storage is just as important as the drying process itself. Allow the leaves to cool completely before placing them in a clean, airtight container. Store your homemade dried basil in a cool, dark, dry place away from direct sunlight, heat, and moisture. For the best flavor, consider keeping the leaves whole and crumbling them only when you are ready to cook.
Labeling your container with the date can also help you keep track of freshness. Always check for unusual smells, signs of moisture, or mold before using stored herbs.

Plant Nest Blog’s author is passionate about plants, gardening, and sustainable living. Through research and practical experience, they share helpful plant care tips, gardening guides, and easy solutions to help readers grow healthier plants and create greener spaces.