
Many people think a clover plant is difficult to care for and only experienced gardeners can keep it alive. That’s simply not true. Once you understand its basic needs, learning how to care for clover plant is surprisingly easy. With the right light, watering routine, and soil, your plant can stay healthy and vibrant throughout the year.
Clover plants are loved for their beautiful leaves, compact size, and low-maintenance nature. Whether you grow one indoors on a windowsill or outdoors in a container, it adds color and charm to any space. Some varieties even produce delicate flowers that make the plant even more attractive.
If you’re a beginner, don’t worry. You don’t need expensive tools or years of gardening experience. Following a few simple clover plant care tips can make a big difference in your plant’s growth and overall health.
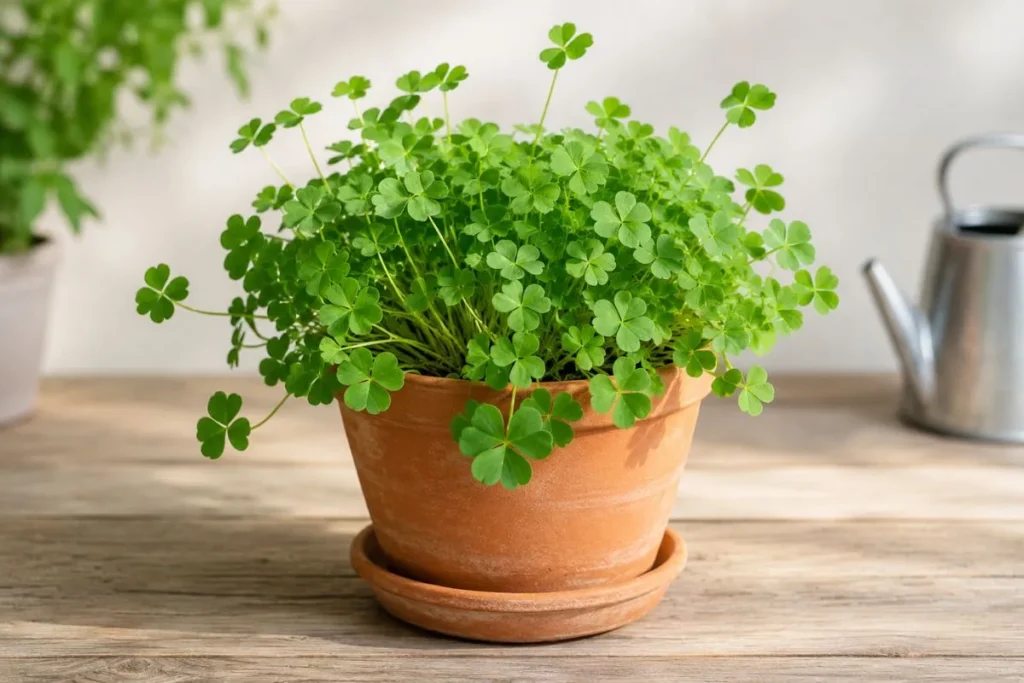
In this complete guide, you’ll learn how to grow clover plant successfully, how to water it properly, choose the best soil, provide the right amount of sunlight, fertilize it correctly, and solve common problems before they become serious.
Whether you’re interested in shamrock plant care, Oxalis plant care, or simply want to know how to care for clover plant indoors, this guide will help you grow a thriving plant with confidence.
Understanding the Clover Plant
Before you can master caring for clover plant, it’s helpful to understand what type of plant you have. Many plants sold as “clover” actually belong to different plant families, and knowing the difference makes it much easier to provide the right care.
What Is a Clover Plant?
The term “clover plant” is commonly used for two different types of plants.
The first is true clover, which belongs to the Trifolium genus. These plants are often grown outdoors as ground cover, in lawns, or as cover crops because they improve soil health and attract pollinators.
The second is the Oxalis plant, often called the shamrock plant. This is the variety most people grow indoors as a decorative houseplant. Its butterfly-shaped leaves open during the day and fold up at night, making it one of the most interesting indoor plants to own.
Because of its attractive foliage and compact size, Oxalis plant care has become increasingly popular among indoor gardeners. Although it resembles true clover, it has different growing requirements, so it’s important not to confuse the two.
If you’re searching for how to care for clover plant in pots, you’re most likely growing an Oxalis variety.
Popular Types of Clover Plants
Not all clover plants look the same. Some are grown for their colorful leaves, while others are valued for their flowers or landscaping benefits.
Purple Clover (Oxalis triangularis)
Purple clover is one of the most popular houseplants. Its deep purple leaves create a dramatic display, and small white or pale pink flowers appear throughout the growing season.
This variety grows well in bright, indirect light and is a favorite among people looking for a unique indoor plant.
Green Shamrock Plant
The green shamrock plant features bright green, heart-shaped leaves and delicate white flowers. It’s often associated with St. Patrick’s Day and is easy to grow indoors with proper care.
Many beginners choose this variety because it adapts well to normal household conditions.
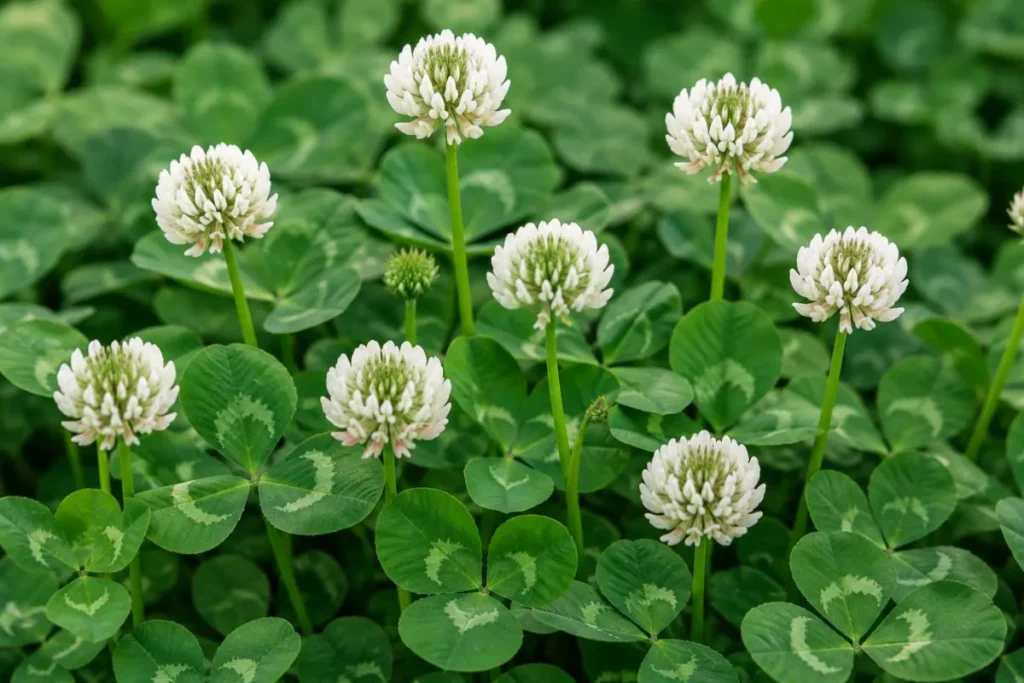
White Clover
White clover is commonly grown outdoors in gardens and lawns. It’s known for its white flower heads and ability to improve soil by fixing nitrogen naturally.
It also attracts bees and other beneficial pollinators, making it a great addition to wildlife-friendly gardens.
Red Clover
Red clover is another outdoor variety that produces attractive pink to reddish-purple flowers. Besides its ornamental value, it’s frequently used as a cover crop and in pollinator gardens.
Its vigorous growth makes it popular among gardeners who want to improve soil quality naturally.
Benefits of Growing a Clover Plant
Growing a clover plant offers more than just attractive foliage. It’s one of the easiest plants to care for and provides several benefits for both beginner and experienced gardeners.
One of the biggest advantages is its decorative appearance. Whether you choose a purple Oxalis or a green shamrock, the unique leaves add beauty to desks, shelves, windowsills, and patios.
Another benefit is its low-maintenance nature. Once you understand the basics of clover plant care, the plant requires very little daily attention. With proper watering and adequate light, it continues to produce healthy new growth.
Many varieties are suitable for both indoor and outdoor growing. If you’re learning how to care for clover plant indoors, you’ll appreciate how well these plants adapt to containers and small spaces. Outdoor varieties, on the other hand, can be used to improve garden soil and attract beneficial insects.
True clover varieties are especially valuable because they help enrich the soil with nitrogen. This natural process improves soil fertility and benefits nearby plants without relying heavily on chemical fertilizers.
Perhaps the greatest benefit is that clover plants are perfect for beginners. They’re forgiving, grow relatively quickly, and provide clear signs when they need more water or light. This makes them an excellent choice for anyone new to indoor gardening.
Why Understanding Your Clover Plant Matters
Before changing your watering schedule or buying fertilizer, identify whether your plant is a true clover or an Oxalis. Each type has slightly different care requirements, and understanding those differences will help you build the right clover plant care routine.
Once you know your plant’s needs, providing the proper light, water, soil, and seasonal care becomes much easier. That knowledge lays the foundation for growing a healthy, long-lasting plant.
In the next section, you’ll learn the essential growing requirements, including the best light, temperature, humidity, soil, and pot selection to help your clover plant thrive.
How to Care for Clover Plant: Essential Growing Requirements
Many people believe that a clover plant can grow anywhere without much attention. While it’s true that clover plants are easy to care for, they still need the right growing conditions to stay healthy. Providing proper light, temperature, humidity, soil, and a suitable pot is the foundation of successful clover plant care.
If you’re learning how to care for clover plant indoors or planning to grow one in a container, these essential growing requirements will help your plant thrive.
Best Light for Clover Plants
Light plays a major role in keeping a clover plant healthy and colorful.
Most indoor clover plants, especially Oxalis triangularis, grow best in bright indirect light. Place the plant near a bright window where it receives plenty of natural light without being exposed to intense afternoon sun.
A few hours of gentle morning sunlight are usually beneficial, but strong midday sunlight can scorch the delicate leaves and cause them to fade or curl.
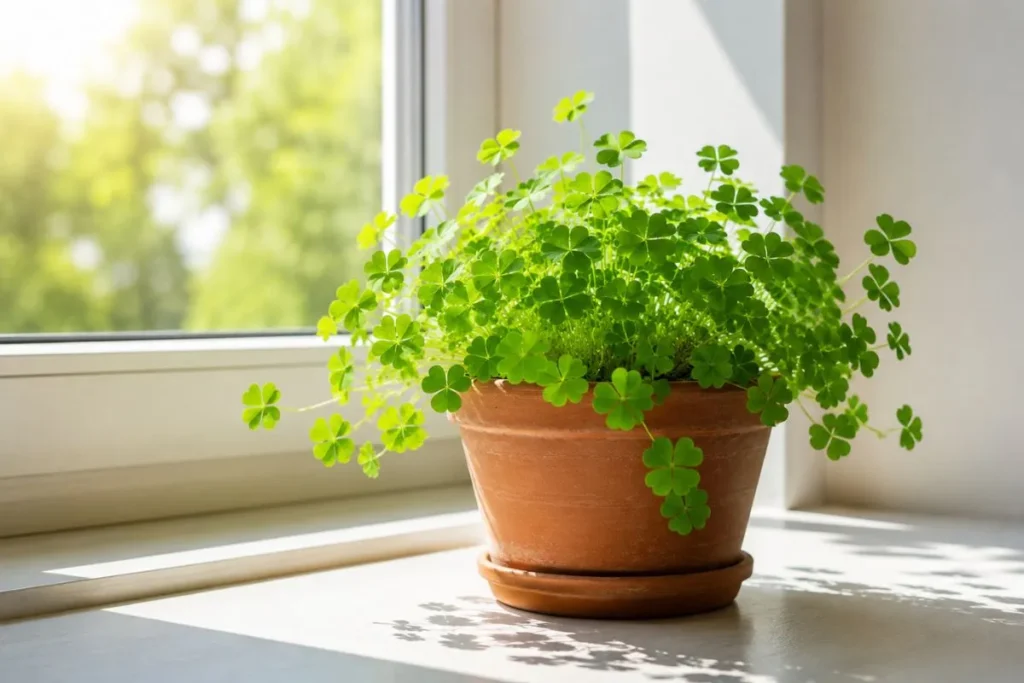
If your plant doesn’t receive enough light, it may become leggy, produce fewer leaves, and lose its vibrant color. Rotating the pot every week also helps the plant grow evenly.
For outdoor plants, partial sunlight is usually the best choice. Morning sun combined with light afternoon shade creates ideal growing conditions.
Providing the correct amount of light is one of the most important steps in how to grow clover plant successfully.
Ideal Temperature
Clover plants prefer mild temperatures and grow best in a comfortable indoor environment.
The ideal temperature ranges between 60°F and 75°F (16°C to 24°C). This range encourages steady growth and healthy foliage.
Avoid placing your plant near heating vents, fireplaces, air conditioners, or drafty windows. Sudden temperature changes can stress the plant and slow its growth.
During winter, protect outdoor clover plants from frost whenever possible. If you’re growing a potted plant outdoors, move it to a sheltered location before temperatures become too cold.
Maintaining a stable temperature is an important part of caring for clover plant throughout the year.
Humidity Requirements
One reason clover plants are popular houseplants is that they adapt well to normal indoor humidity.
Average household humidity is usually enough for healthy growth. However, if the air inside your home becomes very dry, especially during winter when heating systems are running, your plant may benefit from slightly higher humidity.
You can increase humidity by placing the pot on a pebble tray filled with water or by grouping it with other houseplants. This creates a slightly more humid environment without requiring constant attention.
Avoid placing your clover plant directly beside heaters or air vents, as dry air can cause the leaf edges to become brown and crispy.
Providing the right humidity helps maintain healthy foliage and supports overall Oxalis plant care.
Best Soil for Clover Plant
Using the right soil is just as important as watering correctly.
The best soil for growing a clover plant is a loose, well-draining potting mix that allows excess water to drain away quickly. Soil that stays wet for too long increases the risk of root rot.
A high-quality indoor potting mix combined with perlite or coarse sand improves drainage while still holding enough moisture for healthy root growth.
Heavy garden soil should generally be avoided in containers because it becomes compacted and limits airflow around the roots.
Healthy roots are the foundation of a healthy plant, making well-draining soil one of the most important parts of clover plant care.
Choosing the Right Pot
The container you choose has a big impact on your plant’s health.
If you’re wondering how to care for clover plant in pots, always choose a pot with drainage holes. These holes allow excess water to escape and help prevent waterlogged soil.
Select a pot that is only slightly larger than the plant’s root system. An oversized container holds more moisture than necessary, increasing the risk of overwatering.
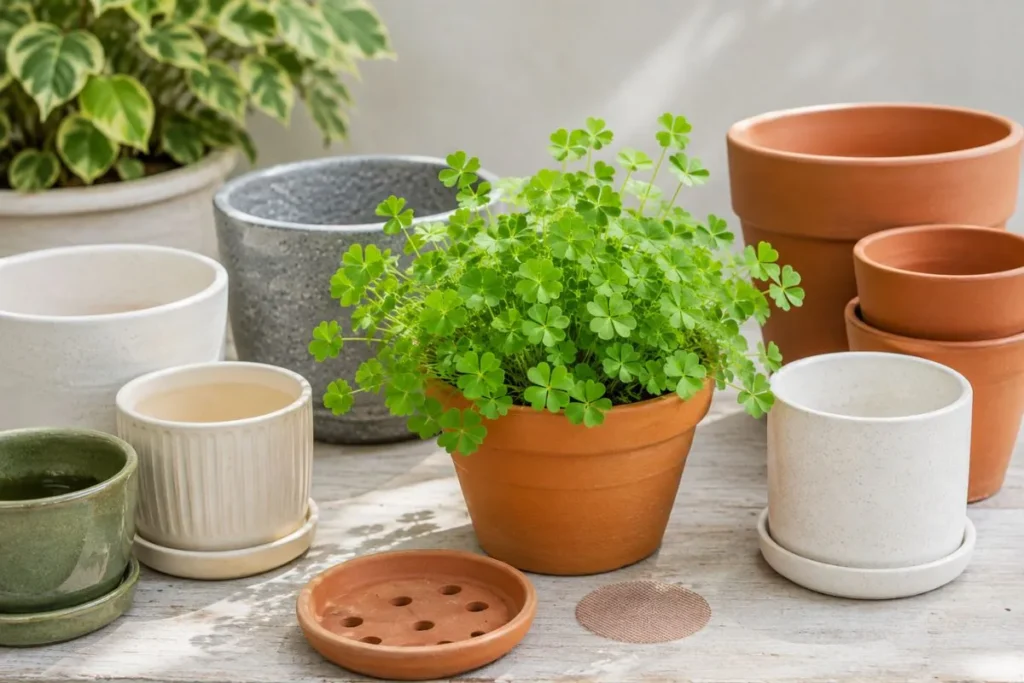
Both plastic and terracotta pots can work well. Plastic pots retain moisture longer, making them suitable for dry indoor environments. Terracotta pots dry out more quickly because the clay allows moisture to evaporate through the sides, making them a good choice if you tend to water a little too often.
As your clover plant grows, repot it into a slightly larger container only when the roots become crowded. Giving the plant too much space too soon can slow healthy growth.
Choosing the proper container is an easy but often overlooked part of a successful clover plant care routine.
Creating the Perfect Growing Environment
Growing a healthy clover plant isn’t complicated. It simply requires the right combination of bright indirect light, comfortable temperatures, moderate humidity, well-draining soil, and a pot with good drainage.
When these basic needs are met, your plant is much more likely to produce lush foliage, maintain vibrant leaf color, and continue growing throughout the active season.
Whether you’re growing a shamrock plant on your windowsill or caring for an Oxalis plant in a decorative container, creating the right environment is the first step toward long-term success.
Watering Your Clover Plant the Right Way
Many people believe that watering a clover plant every day will help it grow faster. That’s one of the most common mistakes. In reality, too much water is far more harmful than slightly dry soil. Learning how to care for clover plant starts with understanding when your plant actually needs water.
A proper watering routine keeps the roots healthy, prevents diseases, and encourages steady growth. Whether you’re learning how to care for clover plant indoors or growing one in a container outside, watering correctly is one of the most important parts of successful clover plant care.
How Often Should You Water a Clover Plant?
One of the most common questions beginners ask is, how often should you water a clover plant?
There isn’t one fixed schedule because watering depends on factors like temperature, humidity, sunlight, and the size of the pot. Instead of watering on specific days, check the soil first.
Insert your finger about one inch into the soil. If the top layer feels dry, it’s time to water. If it still feels moist, wait another day or two before checking again.
During the active growing season in spring and summer, most clover plants need watering more often because they produce new leaves and use more moisture.
In cooler months or during dormancy, the plant grows more slowly and requires much less water.
Following this simple method creates a healthy clover plant watering schedule without risking overwatering.
Signs of Overwatering
Overwatering is one of the biggest reasons clover plants struggle.
When the soil stays wet for too long, the roots cannot get enough oxygen. This weakens the plant and may eventually lead to root rot.
Some common signs of overwatering include yellow leaves, soft stems, drooping foliage even when the soil is wet, slow growth, and an unpleasant smell coming from the potting mix.
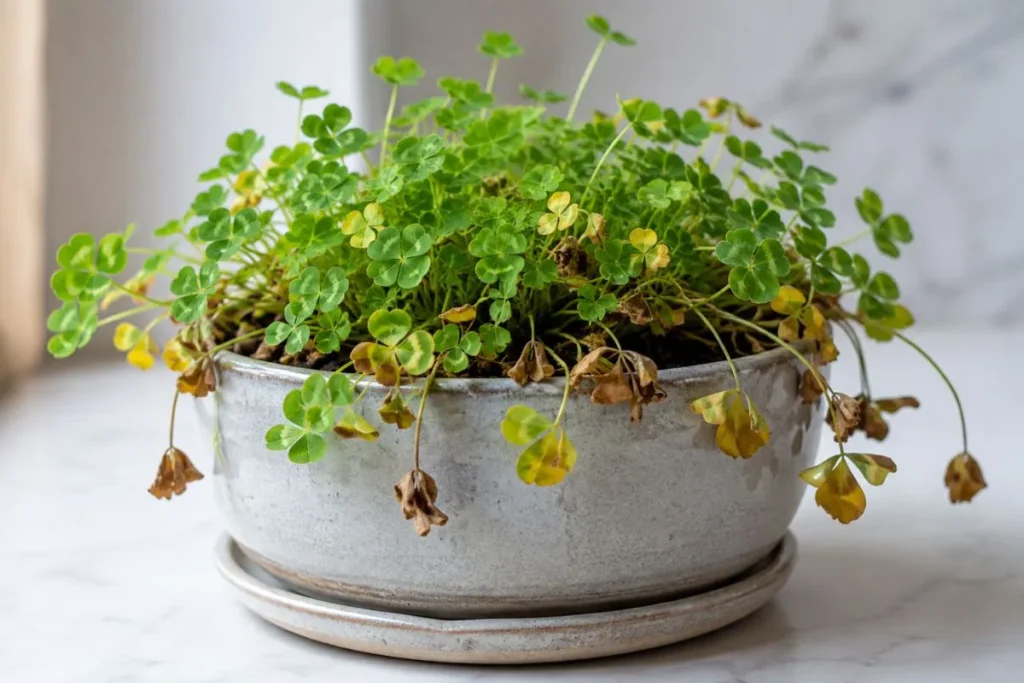
If you notice these symptoms, stop watering immediately and allow the soil to dry slightly before watering again.
Also check that your pot has proper drainage holes and that excess water can escape easily.
Preventing overwatering is one of the easiest ways to keep a healthy clover plant.
Signs of Underwatering
Although clover plants don’t like soggy soil, they also shouldn’t stay completely dry for long periods.
An underwatered plant often develops dry or crispy leaf edges, drooping leaves, curling foliage, and slow growth. In severe cases, the leaves may begin to fall off.
If the soil has become completely dry, water the plant thoroughly until excess water drains from the bottom of the pot.
After watering, allow the excess moisture to drain away instead of letting the pot sit in standing water.
A balanced watering routine is the secret to proper clover plant maintenance.
Seasonal Watering Tips
Your plant’s watering needs change throughout the year.
Spring
Spring is the beginning of active growth. As new leaves appear, water whenever the top inch of soil becomes dry. This supports healthy development during the growing season.
Summer
Warm temperatures increase evaporation, so your plant may need water more frequently. Check the soil regularly instead of following a fixed schedule.
Fall
As temperatures begin to cool, growth naturally slows down. Reduce watering slightly and continue checking the soil before each watering.
Winter
Many Oxalis plants enter a dormant period during winter. During this time, they require much less water because growth temporarily stops.
If your plant is dormant, keep the soil only slightly moist and avoid frequent watering until new growth appears again.
Adjusting your watering routine with the seasons is an important part of how to keep a clover plant healthy all year.
Water Quality Matters
Many people focus only on how much they water but forget about the quality of the water itself.
Whenever possible, use room-temperature water. Extremely cold or hot water can shock the roots and stress the plant.
If your tap water contains high levels of chlorine or minerals, allowing it to sit overnight before watering may help. Rainwater or filtered water can also be excellent options for long-term clover plant care.
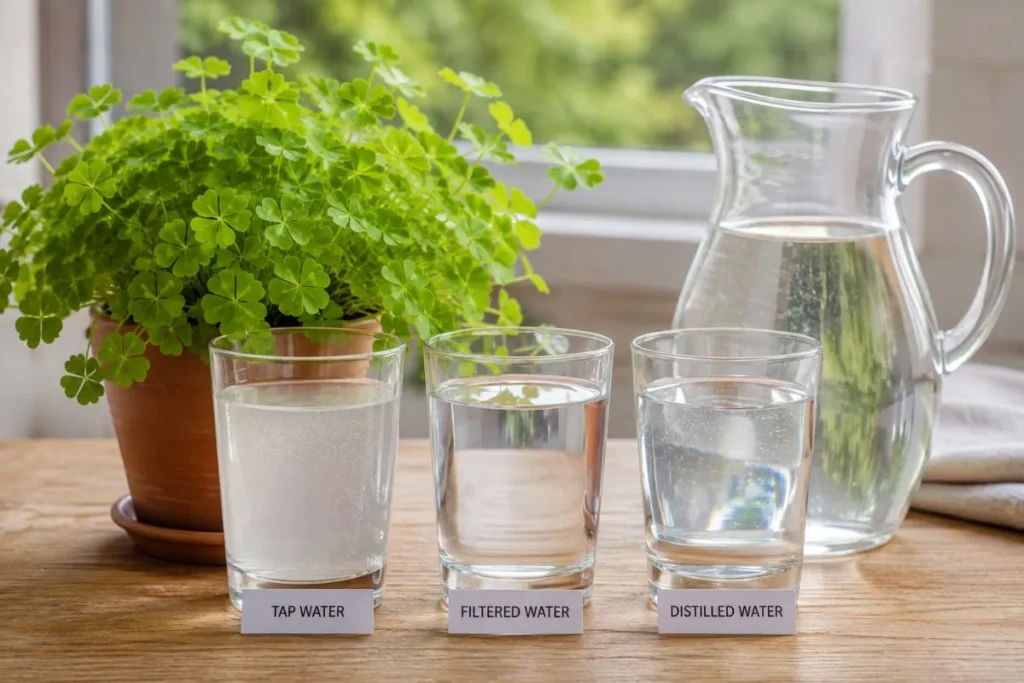
Always water the soil directly instead of soaking the leaves. Wet foliage can increase the risk of fungal problems, especially in humid conditions.
Good water quality supports healthier roots and stronger overall growth.
Helpful Watering Tips
A few simple habits can make watering much easier.
Always check the soil before watering instead of following a strict calendar. Water deeply until excess water drains from the bottom of the pot, then empty the saucer so the roots don’t sit in standing water. Avoid watering a little every day, as shallow watering encourages weak root growth.
These small habits help build a reliable clover plant care routine and reduce common watering mistakes.
Fertilizing Clover Plants
Many people believe that adding more fertilizer will make a clover plant grow faster and healthier. In reality, too much fertilizer can do more harm than good.
Overfeeding can damage the roots, cause weak growth, and even reduce the plant’s overall health. The key to how to care for clover plant is using the right fertilizer in the right amount at the right time.
A balanced fertilizing routine provides your clover plant with the nutrients it needs without overwhelming it. Whether you’re practicing clover plant care indoors or outdoors, a little fertilizer goes a long way.
Does a Clover Plant Need Fertilizer?
Yes, but only in moderation.
Most clover plants, especially Oxalis plant varieties grown indoors, are not heavy feeders. They can grow well with occasional fertilizing during their active growing season.
If your plant is growing in fresh, nutrient-rich potting soil, it may not need fertilizer for the first few months. As the nutrients in the soil become depleted, a light feeding helps support healthy leaves, stronger roots, and steady growth.
Avoid fertilizing during the plant’s dormant period because it isn’t actively growing and won’t use the extra nutrients effectively.
Best Fertilizer for Clover Plant
Choosing the right fertilizer makes a noticeable difference in your plant’s health.
A balanced, water-soluble houseplant fertilizer works well for most clover plant care routines. A balanced formula, such as 10-10-10 or 20-20-20, supplies equal amounts of nitrogen, phosphorus, and potassium to support healthy foliage, root development, and overall plant growth.
Organic fertilizers are also a great choice if you prefer natural gardening methods. Compost tea, worm castings, or diluted liquid seaweed can provide gentle nutrition while improving soil quality over time.
No matter which fertilizer you choose, always dilute it according to the product instructions. A weaker solution is usually safer than a stronger one.
How Often to Fertilize
A regular but moderate feeding schedule is all your clover plant needs.
During spring and summer, when the plant is actively growing, fertilize about once every four to six weeks. This gives the plant enough nutrients without causing buildup in the soil.
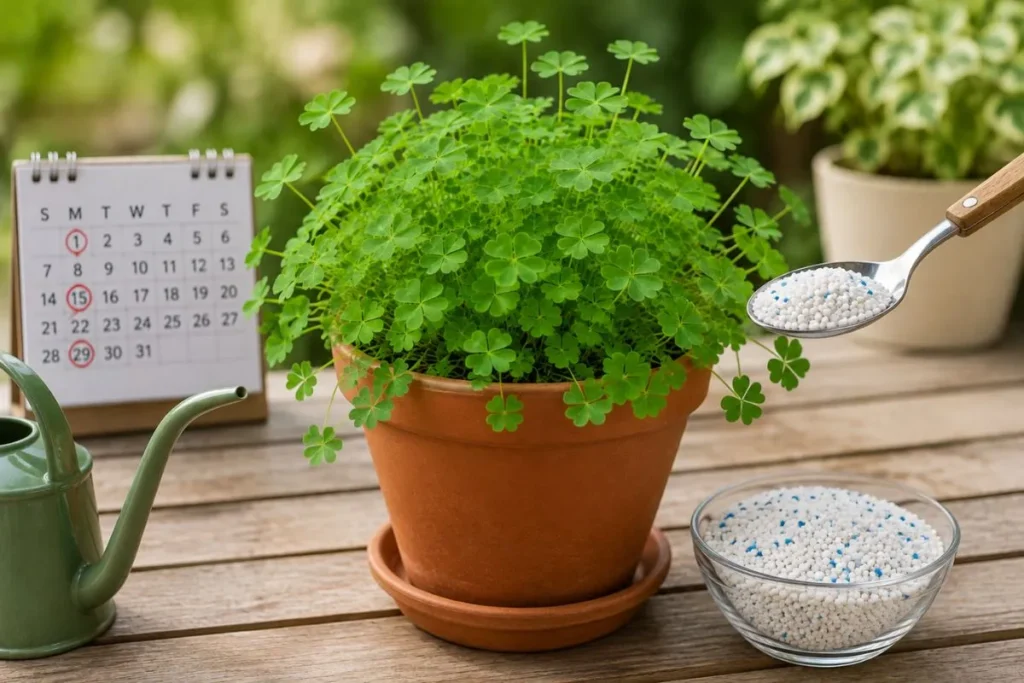
As growth slows during fall, reduce feeding. Once the plant enters dormancy in winter, stop fertilizing completely until new leaves begin to appear again.
Following this schedule supports healthy clover plant maintenance and encourages consistent growth throughout the active season.
Common Fertilizing Mistakes
Many clover plant problems begin with improper fertilizing rather than a lack of nutrients.
One common mistake is applying fertilizer too often. Excess nutrients can build up in the soil, causing leaf burn and damaging the roots.
Another mistake is fertilizing dry soil. Always water the plant lightly before applying liquid fertilizer. This helps protect the roots from fertilizer burn and allows nutrients to spread more evenly.
Using more fertilizer than recommended is another common error. More fertilizer does not mean faster growth. Instead, it can lead to weak stems, yellowing leaves, and poor overall health.
Finally, avoid fertilizing a dormant clover plant. Since the plant is resting, extra nutrients simply remain in the soil and may create unnecessary stress for the roots.
Signs Your Clover Plant Needs Nutrients
A healthy clover plant produces vibrant leaves and steady new growth. If you notice slow growth, smaller leaves, or pale foliage during the active growing season, your plant may benefit from a light feeding.
However, before adding fertilizer, make sure the problem isn’t caused by incorrect watering, poor lighting, or unsuitable soil. These issues are much more common than nutrient deficiencies.
Common Clover Plant Problems and Solutions
Many people assume that a clover plant is dying as soon as it develops yellow leaves or stops growing. In most cases, that’s not true. Most clover plant problems are caused by simple care mistakes that can be fixed quickly. Once you identify the cause, your plant often recovers with the right care.
If you’re learning how to care for clover plant, knowing how to spot and solve common problems will help keep your plant healthy throughout the year.
Leaves Turning Yellow
Yellow leaves are one of the most common issues in clover plant care.
In many cases, overwatering is the main cause. When the soil stays wet for too long, the roots struggle to absorb oxygen, causing the leaves to lose their healthy green color.
Poor drainage, old potting soil, or a lack of sunlight can also contribute to yellowing leaves.
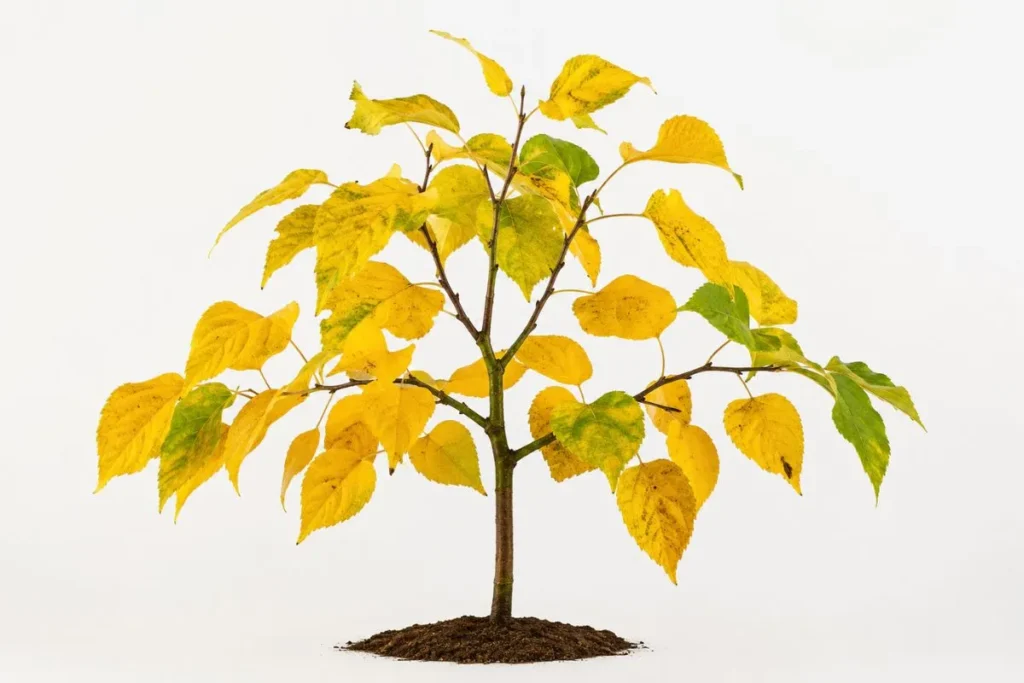
To solve the problem, allow the top layer of soil to dry before watering again. Make sure your pot has drainage holes and place the plant where it receives plenty of bright, indirect light.
If only a few older leaves turn yellow, this is often part of the plant’s normal growth cycle and isn’t a cause for concern.
Leaves Curling
Curled leaves usually indicate that the plant is under stress.
Dry soil, hot temperatures, direct afternoon sunlight, or very low humidity can all cause the leaves to curl inward.
Check the soil moisture first. If it’s completely dry, water the plant thoroughly. If the soil is already moist, move the plant away from harsh sunlight and maintain a more stable environment.
Healthy watering habits and proper lighting are often enough to solve this problem.
Brown Leaf Tips
Brown leaf tips usually develop when the air is too dry or when the plant experiences inconsistent watering.
Mineral buildup from hard tap water or excessive fertilizer can also cause the edges of the leaves to turn brown.
Water consistently, avoid overfertilizing, and consider using filtered or rainwater if your local tap water contains high levels of minerals.
Removing damaged leaf tips also helps keep the plant looking tidy.
Leggy Growth
If your clover plant develops long, weak stems with fewer leaves, it’s usually searching for more light.
This stretched appearance, known as leggy growth, happens when the plant doesn’t receive enough bright, indirect sunlight.
Move your plant closer to a bright window or provide supplemental grow lights if natural light is limited.
Rotating the pot every week also encourages balanced growth and prevents the plant from leaning toward one direction.
Root Rot
Root rot is one of the most serious problems affecting a clover plant.
It develops when the roots remain in constantly wet soil for long periods. Signs include yellow leaves, soft stems, drooping foliage, black roots, and an unpleasant smell coming from the pot.
If you suspect root rot, carefully remove the plant from its pot and inspect the roots. Trim away any black or mushy roots with clean scissors, then repot the plant in fresh, well-draining soil.
Going forward, water only when the top inch of soil feels dry and never allow the pot to sit in standing water.
Plant Not Growing
Sometimes a clover plant appears healthy but simply stops producing new leaves.
This can happen for several reasons, including insufficient light, nutrient-poor soil, incorrect watering, or natural dormancy.
First, check whether your plant is in its dormant phase. If it is, reduced growth is completely normal.
If dormancy isn’t the reason, review your care routine. Make sure the plant receives bright indirect light, proper watering, and occasional feeding during the growing season.
With the right conditions, healthy growth usually resumes.
How to Prevent Common Clover Plant Problems
Most issues can be avoided by following a simple clover plant care routine.
Check the soil before watering, provide bright indirect light, use well-draining soil, and avoid sudden changes in temperature. Keep the leaves clean, inspect the plant regularly, and remove damaged foliage when necessary.
A few minutes of routine care each week can prevent many of the problems that affect indoor plants.
Frequently Asked Questions (FAQs)
How do you care for a clover plant indoors?
To care for a clover plant indoors, place it in bright indirect light, water only when the top inch of soil feels dry, and grow it in well-draining soil. Keep the temperature between 60°F and 75°F (16°C to 24°C) and avoid placing the plant near heating vents or cold drafts.
Feed it with a balanced fertilizer every four to six weeks during the growing season for healthy growth.
How often should I water a clover plant?
There isn’t a fixed watering schedule because it depends on the season and your home’s conditions. As a general rule, water your clover plant when the top inch of soil becomes dry.
During spring and summer, you may need to water more frequently, while during winter or dormancy, watering should be reduced.
Why are my clover plant leaves turning yellow?
Yellow leaves are usually caused by overwatering, poor drainage, or insufficient sunlight. Check the soil before watering, make sure your pot has drainage holes, and place the plant where it receives bright, indirect light.
If only older leaves are turning yellow, it may simply be part of the plant’s natural growth cycle.
Why is my clover plant going dormant?
Dormancy is a natural stage for many Oxalis and shamrock plants. During this period, the plant may stop growing and lose some or all of its leaves. This doesn’t mean the plant is dead. Reduce watering, stop fertilizing, and allow the plant to rest until new growth appears.
Can clover plants grow outdoors?
Yes. Many clover plants grow well outdoors when planted in suitable conditions. Outdoor varieties generally prefer partial sun and well-draining soil. If you’re growing an indoor Oxalis plant outside, protect it from extreme heat, frost, and heavy rainfall.
What is the best soil for a clover plant?
The best soil for growing a clover plant is a light, well-draining potting mix. Mixing regular potting soil with perlite or coarse sand improves drainage and helps prevent root rot. Healthy roots are essential for strong growth and vibrant foliage.
How do I revive a dying clover plant?
Start by identifying the cause of the problem. Check the soil moisture, inspect the roots, and make sure the plant receives enough light. Remove damaged leaves, adjust your watering routine, and repot the plant if the soil remains wet for long periods. If the plant is dormant, give it time to recover naturally before expecting new growth.
Is a clover plant easy to care for?
Yes. A clover plant is considered one of the easiest houseplants to maintain. Once you understand its basic needs for light, water, soil, and seasonal care, it becomes a low-maintenance plant that’s suitable for beginners and experienced gardeners alike.
Conclusion:
Learning how to care for clover plant doesn’t have to be complicated. Once you understand its basic needs, keeping it healthy becomes simple and enjoyable. The secret is providing the right balance of light, water, soil, and seasonal care while avoiding common mistakes like overwatering or poor drainage.
Whether you’re growing a purple Oxalis, a green shamrock plant, or another variety, consistency is the key to success. Place your plant in bright indirect light, water only when the soil begins to dry, use a well-draining potting mix, and fertilize lightly during the active growing season. These simple habits will encourage lush foliage and long-lasting growth.
Don’t be alarmed if your clover plant slows down or enters dormancy during certain times of the year. This is a natural part of its life cycle. With proper care and a little patience, your plant will produce fresh, healthy leaves when the growing season returns.
Remember to inspect your plant regularly for signs of yellow leaves, curling foliage, pests, or other common issues. Catching problems early makes them much easier to fix and helps your plant stay in excellent condition.
Whether you’re searching for clover plant care for beginners, how to care for clover plant indoors, or how to keep a clover plant healthy all year, following the tips in this guide will help you grow a beautiful and thriving plant with confidence.
We hope this complete clover plant care guide has answered your questions and made caring for your plant easier. If you found this article helpful, explore our other gardening and houseplant guides for more practical tips, expert advice, and step-by-step care instructions to help every plant in your home flourish.

Plant Nest Blog’s author is passionate about plants, gardening, and sustainable living. Through research and practical experience, they share helpful plant care tips, gardening guides, and easy solutions to help readers grow healthier plants and create greener spaces.